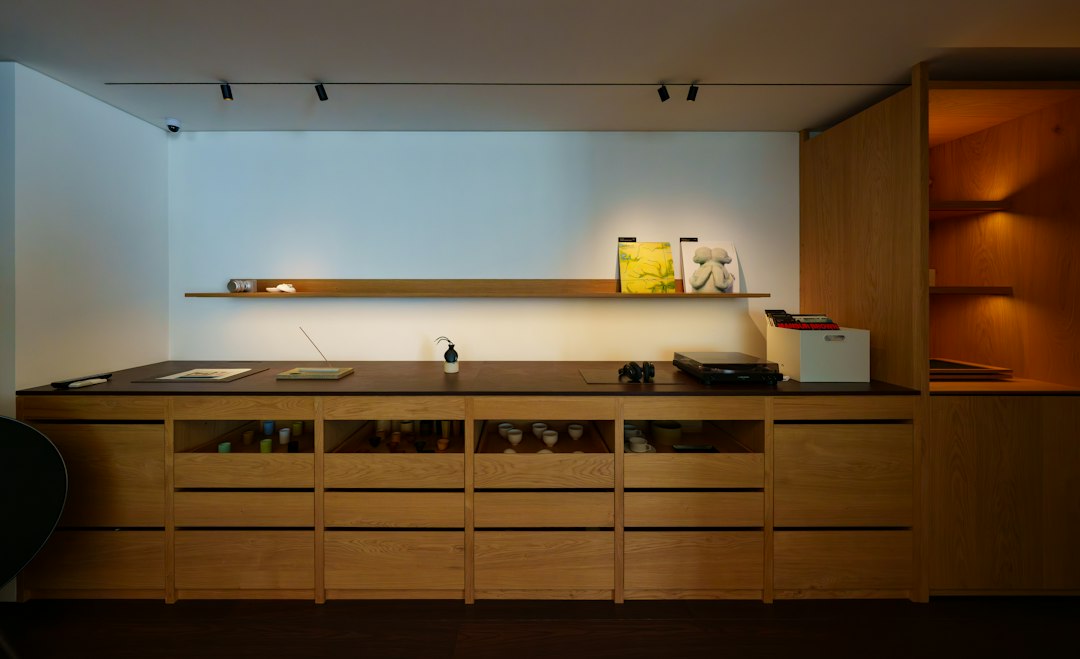
You’re probably here because you’re wondering how to light up your workspace cabinets without adding bulk or clashing with your decor. The good news is, slim profile cabinet lighting offers a fantastic solution. These compact fixtures provide essential illumination while blending seamlessly into your design, creating a more stylish and functional area without any visual clutter. It’s all about getting light where you need it, subtly.
Why Slim Lighting Makes a Difference
When it comes to workspaces, whether it’s a home office, a crafting nook, or a professional studio, good lighting is non-negotiable. But traditional lighting can often feel clunky or take up valuable visual real estate. That’s where slim profile cabinet lighting really shines. It’s designed to be unobtrusive, providing focused light without drawing attention to the fixture itself.
Enhancing Aesthetics Without Clutter
Imagine a workspace where every surface is clean, and every line is sleek. Bulky light fixtures can immediately break that aesthetic. Slim lighting, on the other hand, disappears. It lets your cabinetry, your chosen decor, and your work itself be the stars. This minimalist approach is particularly effective in modern or contemporary designs, but it can equally enhance a more traditional space by providing discreet, focused light where it’s needed most. It’s about adding light, not visual noise.
Practical Benefits for Task Focus
Beyond looks, the practical advantages are significant. With slim lighting, you can illuminate specific areas within your cabinets – think shelves holding important files, tools, or art supplies. This targeted lighting reduces eye strain, makes it easier to locate items, and generally improves the functionality of your workspace. No more rummaging in dimly lit corners. It also prevents harsh shadows that can be created by overhead ambient lighting, giving you a clearer view of your work surface and the items you need.
Types of Slim Cabinet Lighting
The world of slim lighting is surprisingly diverse, offering several options depending on your specific needs and DIY comfort level. Each type has its own strengths when it comes to installation, light output, and control.
LED Strip Lights
These are perhaps the most popular choice for slim cabinet lighting, and for good reason. LED strip lights consist of a series of tiny LED emitters mounted on a flexible circuit board. They come in various lengths, can often be cut to size, and are incredibly versatile. You can run them along the underside of shelves, inside cabinet frames, or even behind panels for a subtle glow.
Advantages of LED Strips
The key advantages here are flexibility and low profile. They are incredibly thin, often just a few millimeters thick, making them almost invisible once installed. Installation is typically straightforward, often involving a peel-and-stick adhesive backing. They also offer a wide range of color temperatures, from warm white to cool daylight, and even color-changing (RGB) options for a more dynamic look. Plus, LEDs are energy-efficient and have a long lifespan, meaning less frequent bulb changes.
Installation Considerations
While “peel and stick” sounds simple, getting a perfectly straight line and managing the wiring neatly does require a bit of care. You’ll need to consider where the power supply will be located, as LED strips typically run on low voltage DC power and require a transformer. Think about routing wires through small drilled holes or using wire channels to keep things tidy. For a really polished look, consider housing the strips in aluminum channels with diffusers, which not only protect the LEDs but also create a more even, diffused light rather than individual bright spots.
Puck Lights
Puck lights are small, circular fixtures, often about the size of a hockey puck (hence the name). They are designed for focused, directional lighting and are commonly installed in groups or individually to highlight specific items or areas within a cabinet.
Discreet Spot Illumination
If you have specific items you want to showcase – perhaps a trophy, a collection of unique tools, or a particularly nice set of stationery – puck lights are excellent. They provide a focused beam of light that can make objects pop. Their discreet size means they don’t visually intrude, even when visible. Many models are surface-mounted, making installation relatively easy, while others can be recessed for an even cleaner look.
Wired vs. Battery-Powered Options
Puck lights come in both wired and battery-powered versions. Wired puck lights offer consistent, bright illumination and don’t require battery changes, but they do involve routing wires and connecting to a power source. Battery-powered puck lights are incredibly easy to install – often just peel and stick – and offer maximum flexibility in placement. However, their light output is often lower, and you’ll need to periodically replace batteries, which can be a hassle in frequently used areas. Consider rechargeable battery options for a more sustainable approach.
Under-Cabinet Light Bars
Light bars are rigid, linear fixtures, usually a few inches to a foot or more in length. They are typically slightly thicker than LED strips but offer a more robust housing and often a built-in diffuser for smooth light output.
Uniform Lighting for Wider Areas
Where LED strips are flexible and puck lights are spot-focused, light bars excel at providing uniform illumination across a wider area. If you want to light up an entire shelf or the full length of a cabinet interior, a light bar is a great choice. They often come with simple mounting clips or screws.
Integrated Features
Many under-cabinet light bars come with integrated features like touch sensors for on/off control, dimming capabilities, or even motion sensors. This can add a layer of convenience to your workspace. Some are designed to be linkable, allowing you to connect multiple bars together with a single power source, simplifying wiring for longer runs of cabinetry.
Installation Methods & Power Considerations
Getting your slim lighting installed neatly and safely is just as important as choosing the right type. Thoughtful planning here will pay dividends in both aesthetics and functionality.
Concealed Wiring Techniques
The goal is to make the lighting itself invisible, and that extends to the wiring. For permanent installations, consider drilling small holes through cabinet backs or shelves to thread wires. If you’re using LED strips, position the power connector and transformer in an inconspicuous spot, like behind a cabinet frame or inside an adjacent cabinet. Wire channels or raceways can be used to hide longer runs of wire along the underside of cabinets or walls, painting them to match the surface for maximum discretion.
Powering Your Lights
Most slim cabinet lighting, especially LED options, runs on low-voltage DC power (typically 12V or 24V). This means you’ll need a power supply (often called a driver or transformer) to convert your household AC power to the appropriate DC voltage.
Plugging In vs. Hardwiring
For simplicity, many low-voltage lighting kits come with a power supply that plugs directly into a standard wall outlet. This is the easiest option for DIYers, as it doesn’t require any electrical expertise. Just make sure your chosen outlet isn’t obstructed and can handle the load. For a cleaner, more integrated look, you might consider hardwiring the lights. This means connecting them directly to your home’s electrical system, often to a switch-controlled circuit. However, hardwiring should always be done by a qualified electrician unless you are fully comfortable and knowledgeable about electrical work and local codes. Incorrect hardwiring can be dangerous.
Battery-Powered Solutions
As mentioned, battery-powered options offer ultimate flexibility, especially for temporary setups or areas where running wires is impossible. They eliminate the need for outlets or complex wiring. Just remember the trade-offs: battery life, light output, and the environmental impact of disposable batteries. Rechargeable options are a better long-term choice if you go this route.
Adhesives and Brackets
Installation methods vary by light type. LED strips usually have a strong adhesive backing. Ensure the surface is clean, dry, and smooth for optimal adhesion. For heavier strips or high-traffic areas, supplementing with small mounting clips can prevent sagging over time. Puck lights and light bars often come with small screws or clips for secure mounting. For recessed puck lights, you’ll need to use a hole saw to cut the appropriate size opening in the cabinet material. Always check the manufacturer’s instructions for specific guidance on your chosen fixtures.
Control and Smart Features
Once your lights are installed, how you control them can significantly impact their usability and how well they integrate into your workspace routine. Modern slim lighting offers a range of control options.
Simple On/Off Switches
The most basic control is a simple toggle or rocker switch. These can be integrated into the light fixture itself, mounted on the cabinet frame, or operated via a wall switch connected to the power outlet. For multi-cabinet setups, a single master switch can be convenient, turning all lights on and off simultaneously.
Dimming Capabilities
Dimming is a fantastic feature for workspaces. Bright light is great for detailed tasks, but sometimes you just need a softer glow for ambiance or when taking a break. Many LED strip and light bar systems offer inline dimmers, often small rotary knobs or touch-sensitive pads. For hardwired setups, a compatible wall dimmer switch can provide seamless control. Ensure your chosen lighting system and power supply are dimmable before purchasing a dimmer.
Motion and Touch Sensors
For hands-free operation, motion or touch sensors are excellent. Motion sensors can automatically turn lights on when you open a cabinet door or approach your workspace, and then off after a period of inactivity. This is particularly useful in areas where your hands might be full. Touch sensors, often integrated directly into light bars, allow you to tap or swipe to turn lights on/off or dim them – a very sleek and modern approach.
Smart Home Integration
Taking convenience to the next level, many slim lighting systems are now compatible with smart home platforms. This means you can control your cabinet lights using voice commands (e.g., “Hey Google, turn on cabinet lights”), through a smartphone app, or integrate them into automated routines. Imagine your cabinet lights coming on automatically when you start your workday, or dimming as part of your “winding down” routine. Look for Wi-Fi or Bluetooth enabled systems if smart home integration is a priority.
Design Tips and Creative Placements
Slim cabinet lighting isn’t just about utility; it’s also a powerful tool for enhancing your workspace’s overall design. Thoughtful placement can transform the feel of your area.
Under-Shelf Illumination
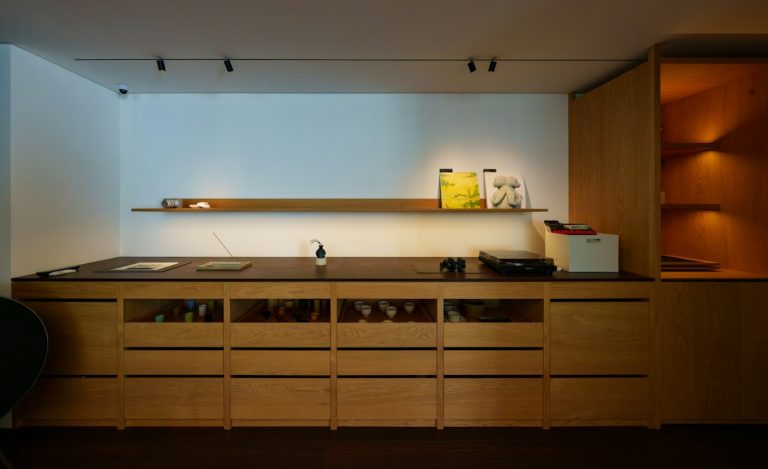
This is perhaps the most common and effective placement. Installing LED strips or light bars on the underside of shelves provides direct, shadow-free illumination to the surface below, whether it’s a countertop, a desk, or another shelf. This is crucial for task lighting and preventing dark spots. It also creates a pleasing, layered lighting effect.
Inside Cabinetry for Visibility
Don’t just think about the exterior. Lighting the inside of your cabinets makes finding items significantly easier. A slim LED strip running vertically along the inside front edge of a cabinet frame, or horizontally along the underside of shelves within the cabinet, can illuminate everything from files to tools. This is especially useful for deep or dark cabinets where items tend to get lost.
Backlighting and Accent Effects
For a more ambient or decorative touch, consider backlighting. This involves placing LED strips behind a panel, mirror, or even along the very back edge of a shelf, facing the wall. The light bounces off the surface, creating a soft glow that outlines the cabinet or highlights a feature without being directly visible. This can add depth and a sophisticated touch to your workspace.
Integrating with Open Shelving
If your workspace incorporates open shelving, slim lighting can be used to highlight decorative items or specific work zones. Running a thin LED strip along the underside or front edge of an open shelf draws attention to the items displayed and provides functional light for whatever is placed on the shelf below. It creates a focal point and adds visual interest.
Color Temperature Considerations
The color temperature of your lights can dramatically affect the mood and functionality of your workspace.
Warm White (2700K-3000K)
This light has a yellowish, cozy glow, similar to traditional incandescent bulbs. It’s great for creating a relaxed, inviting atmosphere. If your workspace is more about creative pursuits, reading, or simply a place where you want to feel comfortable, warm white might be a good choice.
Cool White/Daylight (4000K-5000K)
This light is brighter and more bluish-white, mimicking natural daylight. It’s excellent for tasks requiring focus, detail work, and accuracy, as it enhances contrast and reduces eye strain. For most professional workspaces, drafting tables, or areas where precision is key, cool white or daylight is generally preferred.
Tunable White and RGB Options
For ultimate flexibility, some LED strips offer “tunable white,” allowing you to adjust the color temperature from warm to cool depending on your activity or time of day. RGB (red, green, blue) options allow you to choose from a vast spectrum of colors, which can be fun for setting different moods or adding a creative flourish, though perhaps less practical for everyday task lighting in a professional setting.
By carefully considering these placements and color temperatures, you can not only illuminate your workspace effectively but also elevate its overall design, making it a more pleasant and productive environment.